
WinterSeed

1. Project planning
The project was created over a ten-week production period. After starting on the project in Week 2, I got into pre-production planning and team management.
Before starting full production, I established a production schedule and system of work for all my teams where we established the major production stages and tasks and what we would be doing for them. I designated roles and tasks based on the skills and strengths of each team member and how these would be done.
I also held team meetings and had a basic communication and collaboration structure in WeChat and OneDrive shared documents for different areas of production to work towards the same project goal.
I created a simple Technical Design (TD) Document for the technical planning so that I could outline the core design, technical requirements and production direction of the project. As the production process went on, the preparation methods were valuable for this.
A clear workflow with clear responsibilities and technical documentation was helpful as the team worked through the later stages of production to be more organised and efficient.
2. Game Design and Core Mechanics Development
2.1
2.1 2D Movement and Orthographic Camera
The template was used for the game to create character in Unreal Engine 5. To convert the original third-person movement into a side-scrolling format, I removed the forward and backward movement input and placed the main movement in the lateral direction.
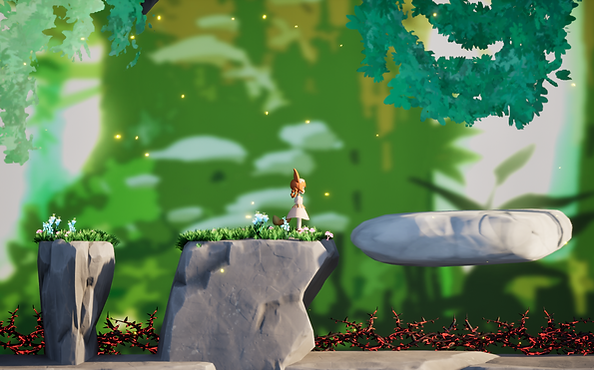
I also added an Orthographic Camera to the Character Blueprint. Even though the characters and environments are still 3D, the orthographic projection made the game feel like it is two-dimensional side-scrolling.
However, we kept 3D lighting and environmental effects by using 3D assets in combination with 2D background. Additionally, basic movement, jumping and other controls were put in the Character Blueprint using UE5's Enhanced Input System.
2D Movement and Orthographic Camera

Transforming System
2.2
Character Transformation System.
The transformation mechanic is intended to enable the player to take on a different form and navigate narrow spaces that are not available in the normal form to integrate the character ability directly into exploration and level progression.
In Blueprint I was able to change the transformation by changing the Visibility and Active of different character meshes and dynamically changing the Capsule's Capsule Half Height.
As a result the transformation not only altered the visual character model, but also the collision volume of the player and this caused the smaller form to move through restricted spaces.
2.3
Physics-based Rope Swinging System.
The rope-swinging mechanic was mainly implemented from Unreal Engine 5's physics system and Cable component in Blueprint. I built a detection sphere around each Grappling Point to determine when the player was in interaction range and used the distance from the player and hook point to give visual reference for when interaction was possible.
When the player started the swing, the start of the Cable was attached to the Player Character's Right Hand Bone Socket while the end was defined by the World Location of the Grappling Point. This allowed the cable to remain connected between the player's hand and the fixed hook point when moving and swinging.

Grapple
2.4
Interactive Elevator System.
The elevator system relied on a Blueprint Interface to communicate between the switch Blueprint and the Elevator Blueprint. Each switch used an Object Reference to identify the particular Elevator Actor it controlled.
The key to the system was the control message sent to the Elevator when the switch was tapped by the player. This allowed individual switches to control a certain elevator independently, without having to implement an entirely separate Blueprint system for each interaction pair.
2.5
Stealth / Stealth Avoidance Mechanic.
The stealth mechanic was designed for the early Snake Cave concept that was later modified as the Miasma Cave. The system constantly checked whether the player was in the hazard detection area and Branch logic would determine if a player was in a safe zone.
If the system was in danger, a player that was inside the danger zone but outside a safe zone would be killed. The system alternated between Safe and Dangerous states at a fixed time and then built a game sequence based on timing, observation and movement between protected areas.

Stealth Avoidance
3. Level design, blockout and development of environment
WEEK 4
Mechanic Blockout Testing and Map Sketching.
In Week 4, I tested the mechanics and blockout of two key levels. The goal here was not to present how well the basic mechanics developed earlier worked on the actual level space.
I re-did the placement of platforms, interactive parts and gameplay obstacles, in order to create better positions and better flow of the game.
In the same week, I also drew level map sketches to design the geography between different areas, routes and significant gameplay points before building the entire blockout.
WEEK 5
Full Level Blockout
I finished the main part of the game at the end of this week. I had already integrated the map sketches and local mechanic tests in a full playable space in which the basic mechanics, interactive elements and level sections could be linked in the best manner.
This blockout also laid the groundwork for the future visual development. Before investing so much time into the visual development I could check on the total route of the player, the connections between gameplay elements, the spatial connections between areas and how the game flow can be traversed.
%20%202026_6_20%200_23_24.png)
Grapple System Blockout
%20%202026_6_20%200_24_06.png)
Sneaky Avoidance Blockout
WEEK 7
Asset integration and environment development
I got most of the 3D and 2D assets from the other team members and moved on from the blockout stage to the environment development and visual development stage.
I gradually replaced blockout geometry with team-produced models and purchased environment assets and repositioned and adjusted them based on gameplay requirements.
Because the dimensions and geometry of the final assets did not always match the original blockout, I reviewed and modified their collision and repeatedly playtested the levels to keep the player moving, jumping, interactions and overall gameplay traversability.

Level Design
4. Alpha Testing and Iteration
WEEK 9
Full Gameplay Integration
I had almost all the major environments and the full gameplay flow by Week 9. The previously separated elements such as level design, gameplay mechanics, environment assets and the team’s 2D and 3D assets were incorporated into a mostly complete version that could be played continuously from beginning to end.
From then on, the development focus shifted from adding new content towards evaluating the full player experience.
27 July
Alpha Testing from 27 July
I formally began Alpha Testing on 27 July. Throughout Weeks 9 and 10, I collected feedback from testers and used the results to further refine the game.
The revisions were mostly based on bugs discovered in testing and any changes to gameplay and progression based on the testers’ experiences.
We can summarise the iteration process as: Playable Build → Alpha Test → Player Feedback → Identify Issues → Bug Fixing / Gameplay Adjustment → Updated Build.