

Red Panda Character
Introduction
This is a complete 3D replica of my original red panda character design, rooted in my own orthographic sketches and 2D concept references. The model was based almost entirely on the proportions and style of the original drawings. The end result appears as a clean and neat character asset with 3 facial expressions and 3 poses to build upon for animation or look-development purposes.

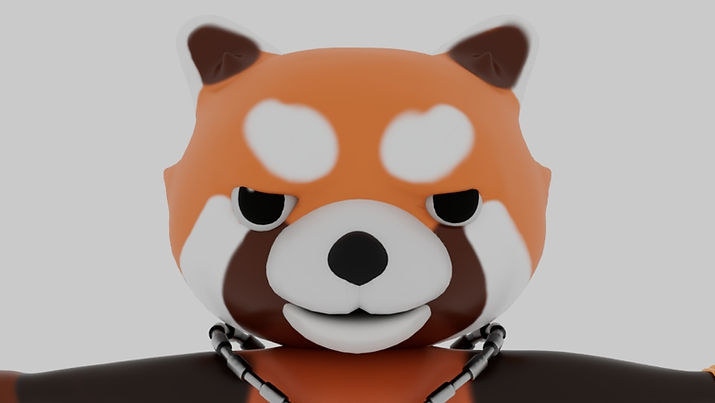
Workflow
This character’s production pipeline has a methodical, time-wise approach. From there, I spent about one week modelling it, creating the form and silhouette of the red panda. Five days were spent retopologising the mesh to ensure we had a clean morphology for future rigging. I also worked on UV layout and UDIM organization, the texture was spread efficiently throughout the model in three days. The texturing stage in Substance Painter
was one week long where I created the colour palette and surface details for the character and stylised the material definition. Rigging had been done for another week we could construct control system to pose and do basic tests of animation. The last look development, lighting and rendering have been done on 26 November, finalising my project.
Modelling
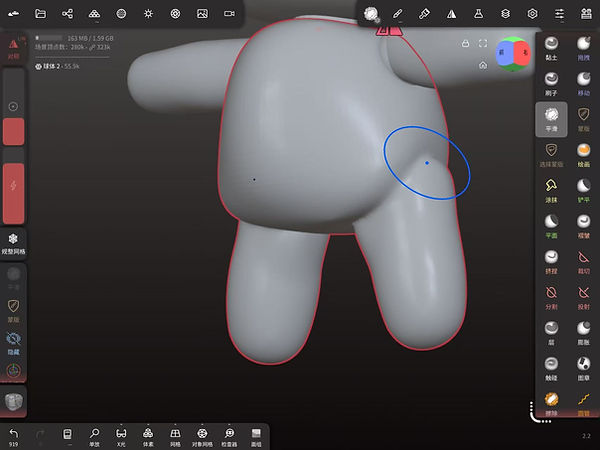
Nomad on iPad helped me to complete the early modelling stage, so this has an intuitive and flexible workflow. With Drag, Move, and Smooth, I manipulated the shape of the panda body with the basic volume, refining the whole shape. Using my three-view drawings throughout the entire design process helped me create a consistent and well-behaved base model that visually portrayed the character’s overall size and soft rounded form.
Retopology
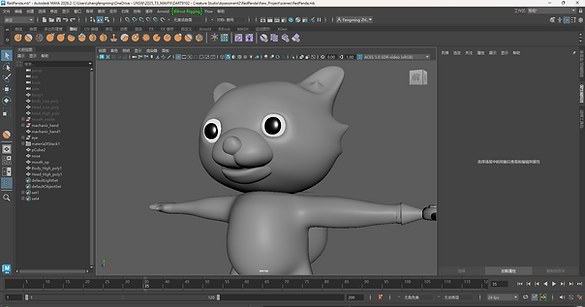
As the original Nomad mesh had a coarsely oriented and densely packed topology, it was not fit for clean 3D printing, rigging, or animation. Therefore, I imported the sculpt into Maya to complete its retopology pass in order to have a production-ready asset. I rebuilt the low-poly model with clean edge loops, distributed evenly throughout, focused more on topology of the facial topology, loops in which deformation is a consideration, and the whole geometry flow with Quad Draw tool. In addition, while creating the face, I took the suggestion from my tutor Mr. Cottrell which allowed for the final character’s design to be developed better. Beyond the organic body for the character, hard surface precision was required in parts for the mechanic hand, tubes, and the energy module. Once the main character topology was done, I manually modelled these mechanical pieces on Maya to ensure that all edges are crisp and structural accuracy and compatibility between each and the remainder of the mesh.

UV Unwrapping
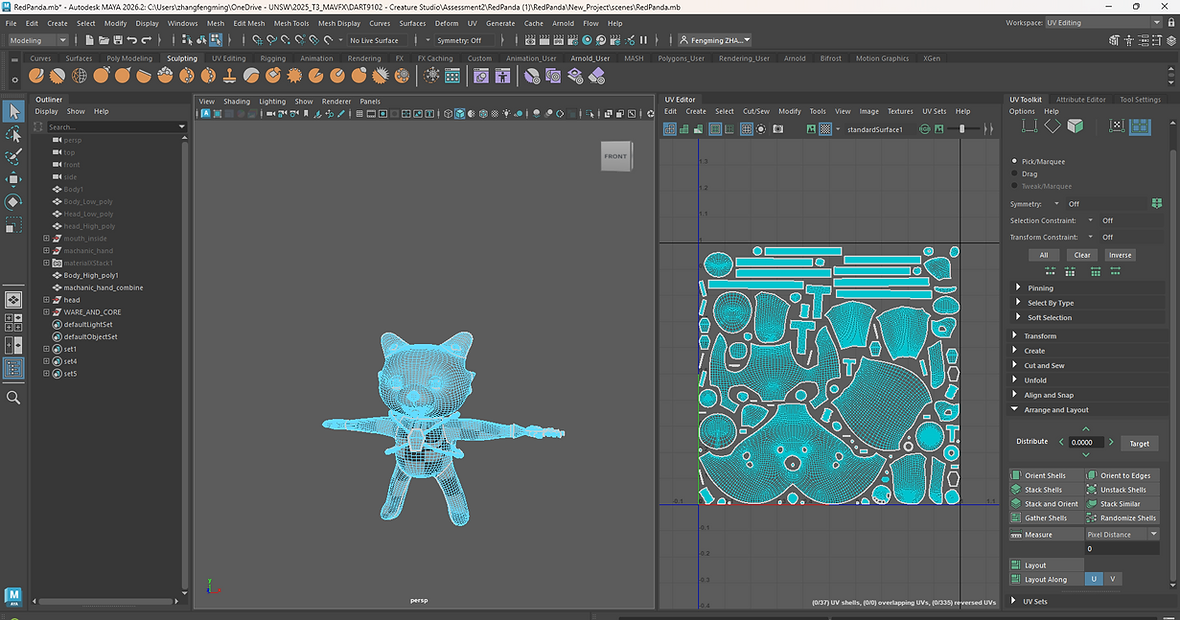
During the UV unwrapping stage, I made sure to stick seams where their appearance would be the least, behind the ears, under the arms, near natural shadows. I learned how to make seam placements and unfolds so that the layout on the UV could be smooth and for production when designing the layout. Every UV shell was then unfolded and aligned so that distortion was minimized, and neatly packed in the 0–1 UV area to achieve high texel coverage. The laid out structure was conducive to high quality texturing in Substance Painter.
3D Printing
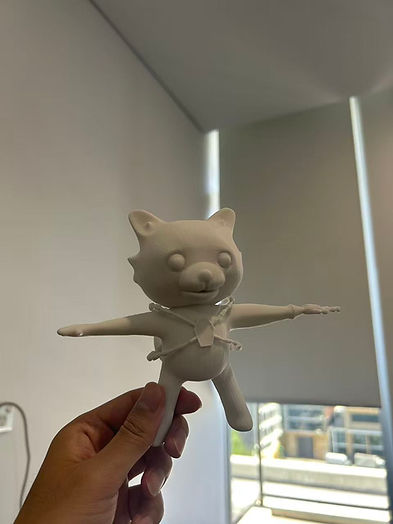
With the intention for the project being designed to fulfil the requirements for both animation and 3D printing, I checked that the character was in a fully closed, watertight mesh from the start for physical construction. By Week 9, while doing the texture work behind the scenes I was able to make a demo of the character with T-Pose 3D printing, which ensured the topology and overall structure were up to print. Unfortunately, due to time, I never found the time to print and paint these posed versions prior to submission. This stage is planned for early March next year, where I will ready the printed model with surface finishing and hand-painted detail work. I believe that a physical model will provide a different experience from that of the digital version

Texturing
All textures were painted by hand with Substance Painter. I began with a simple skin material and hand-painted the red panda’s defining colours and fur markings using different brush tools. For the mechanical parts—the tubing and robotic hand, for example, I superimposed metal and iron to add customisation and colour accents to separate the hard surface from the organic one. When all the texturing was over, I exported all the maps and reattached them with AI Standard Surface shaders on a Maya page taking the desired look and material definition on the original model.


Rigging
Before this project, my rigging experience was rather few, so learning a lot, experimenting a lot was required at this stage. I tried to use Mixamo for auto-rigging initially, but the work, especially for the tubing elements and the tail, reduced loose weights. Consequently, I jettisoned the method and instead used a standard workflow in Maya, the ADV plugin constructed the rig, manual skin weighting added by hand. This took me around a week, during which time I learnt general rigging techniques and then just applied them to my model. I didn’t bother with full facial rigging due to time constraints, and the facial topology just needs some adjustments. Despite being clear on the retopology of the skin, parts like eyelids, mouth and forehead loops weren’t designed for deformation. When trying to close the eyelids these problems became even more apparent leading to unnatural contour. Since I found these problems too late in the pipeline to rework geometry, I finally used the Soft Select tool to make facial expressions. The facial topology needs enhancing and a good facial rig being built that should be a focus in future versions of the character. In addition, based on the fact that real red pandas have very limited facial motion, I created my character to express emotions in its energy module on the chest. An original concept of the character is mood-based in symbolic terms, for example, happy and sad icons as in the below figure.


Rendering
I used the Arnold renderer in Maya for the final rendering stage to get clean, stylised results. The character was portrayed on a turntable so the model was able to be looked at from all angles with the same lighting and response from materials. After completing the workflow, I composited the passes through Adobe After Effects and DaVinci Resolve then created the turntable animation into a cohesive presentation film. I designed three different action poses which are hunting, running, and battle. These poses highlight the primary characteristics of the red panda character: bravery, agility, and power.