

Attack
Introduction
I have created a story about an alien ship appearing in the sky from a portal attempting to attack the city, but a hero created a powerful force shield to protect the city. The theme I have chosen is ‘Good vs Evil’, the whole movie was divided into six shots. My goal is to present the final movie in the style of a cinematic trailer.
Shot1: The appearance of alien ship
For this part, I have used three sources: a wide shot of the city, a portal and an alien ship. To combine these three elements, I first used the ‘Roto’ tool (along with the ‘Copy’ and ‘Premult’ node) to isolate the foreground from the background.
Then, I merged the background, the portal, Alien ship, foreground in sequence. In this part, I want the alien ship to emerge from the dark centre of the portal, so I set keyframed a Roto tool to achieve that effect. I also added Grade node to each element to match the color and the exposure.


Shot2: Human walking
In this part, I used 3D tracking technology with Maya software to create natural shadow effects on the background and then composited them in NukeX. I used the Roto tool to apply the shadow on character separately.
In Maya, I imported the tracking data and created the shadow-catching planes, which are the ground and the wall. Then I placed a square light and a circular plane to simulate the alien ship casting a shadow by blocking the skylight.
In detail, I give Arnold aiMatte Shader to both the ground and the wall plane to make sure the renderer only renders the shadows.


Shot3: The upward view of alien ship
In this part, I used the same method as I have done for shot 1.
However, there would be a soft shadow below the alien ship, so I use the Roto tool to create a soft shadow below the huge alien ship.


Shot4: Shooting rays
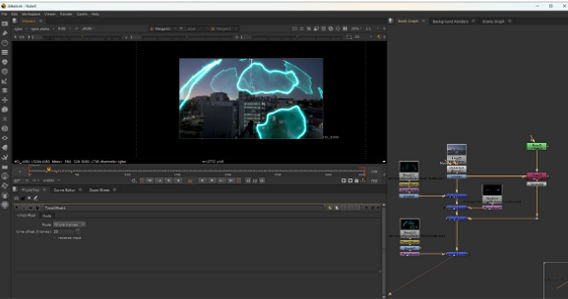
In this part, I use Planner tracker to capture a layer of the hand with motion blur.
Then I composited them as shown in the image below.

Shot5: Shield
In this shot, I used the same method as I have done in shot 3. I changed the position of the shied (both front and back sides) to avoid goof. To connect with the previous shot, the energy beam effect was reused for the transition.
Shot 6: The boss behind
This shot was added when I was making shot 3. Out of personal interest, I created a composite by using 3D camera tracking method, complete with reliable shadows, to reveal the mastermind behind the UFO invasion.

Final editing
After finishing all these parts, I started editing more effects to finish my work, such as glitches and recording view. Finally, I added some transitions, background music and sound effects.

Reflections:
a. Advantages
-
Good scene color matching and camera angle alignment.
-
The result achieved the intended effect, with engaging editing.
-
It took a large amount of work, and I was able to totally apply what I’ve learned and even go beyond that.
-
The assets I have chosen worked really well for the scene.
b. Improvements
-
2D assets often cannot achieve the effect because they are limited in detail and offer less flexibility. For example, the speed of the alien ship was not as expected, and it is hard to change in 2D. It would be better to try using 3D models instead in the future’s works.
-
Although night shooting footages make it easier to match lighting and colors, it also led to higher levels of noise.
-
For the ray’s part, it was difficult to match the lighting, which made it hard to achieve a realistic and believable effect.
Sources
-
Assets from:https://www.productioncrate.com/